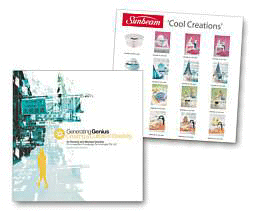
DVD/CD Cover, Inlay & Booklet Printing
| Download Templates: | ||
Designing your disc artwork

We always suggest using a professional designer to design your CD/ DVD covers and other printed material. Using software such as Adobe Illustrator or Photoshop, they will create high resolution artwork ensuring your printed DVD/CD covers, inlays and booklets are of the best possible quality.
If you'd prefer to do it yourself, please use software that can produce high resolution PDF’s. Although use of our free layout templates is not required, you may find they provide a great starting point.
If you decide to have your artwork professionally created, we offer design services at reasonable prices. Minor work is included in the printing cost.
If you have any questions remember, our expert advice is free and always without obligation. Feel free to email us a sample; preferably a high resolution PDF and we can advise you on how to proceed.
Quality and value
When printing, unless otherwise instructed, we will choose the method that will give you the best finished product at the lowest possible price. These include:
Laser printing
We print onto 160 gsm stock using our 1200 dpi colour laser printers. Â
This method allows us to print, cut and score quickly resulting in a fast turnaround for you.Â
Laserkote printed discs can be printed on the same machine as your inlays, covers and sleeves, resulting
in a better colour match.
Note: Slight colour and shading variations may occur due to printing on different materials.
Commercial offset printing
For larger quantities we print on a commercial offset printing press, printing direct from computer to plate. This may take 2 weeks to supply but is a more cost effective solution for higher volumes.
Suggestions to ensure your artwork works!
Do not place text or important images within 3 mm of these end of the art, so although your background can cover the whole disc, please ensure that your text is within more than 3 mm inside the cutting area.
Digital printers or copying machines cannot print with the accuracy of commercial presses where there are long setup times for long runs. Similarly guillotines and cutters are accurate to a millimeter or two. This means that if your design has a border or frame, it can be difficult to place it in the exact position. Allow a good few millimeters outside the frame or border so that slight differences will not be noticeable.
Where you want a background or image to go to the end of the cover or inlay, then you add 'bleed' which means you extend your image beyond the maximum print area. We like bleed because it is easier to trim.
It is most IMPORTANT to remember to expand the fonts to outlines. If you are using Illustrator you select ALL the text, go to the 'Object' menu, choose "Expand' sub-menu, then choose the 'fill' and 'object' as required. You need to do this as we may not have the same font, and your image will then print incorrectly.
Embedded fonts could cause problems if the artwork is opened in another graphic program.
If you do use reverse print (white on a dark background) please ensure that the text is at least 9 pt, and preferably bold, otherwise there is a risk that the print will be filled in.
Artwork not laid out properly could delay delivery, add layout costs and risk errors, but if you feel confused please ask us for friendly help.
We would rather help you in the beginning than fix a problem
We can provide design services for $90 per hour.

